The Front Office GURU Training Academy®
Getting Started
Outlined below are four (4) simple steps on how to begin the Complete Front Office GURU Training Academy course and any other future courses.
Feel free to read through the steps below or proceed to the other guides.
Jump to any of the 4 steps
Logging In • Starting The Course
Course Navigation • Tracking and Resetting Course Progress
STEP 1. Logging In
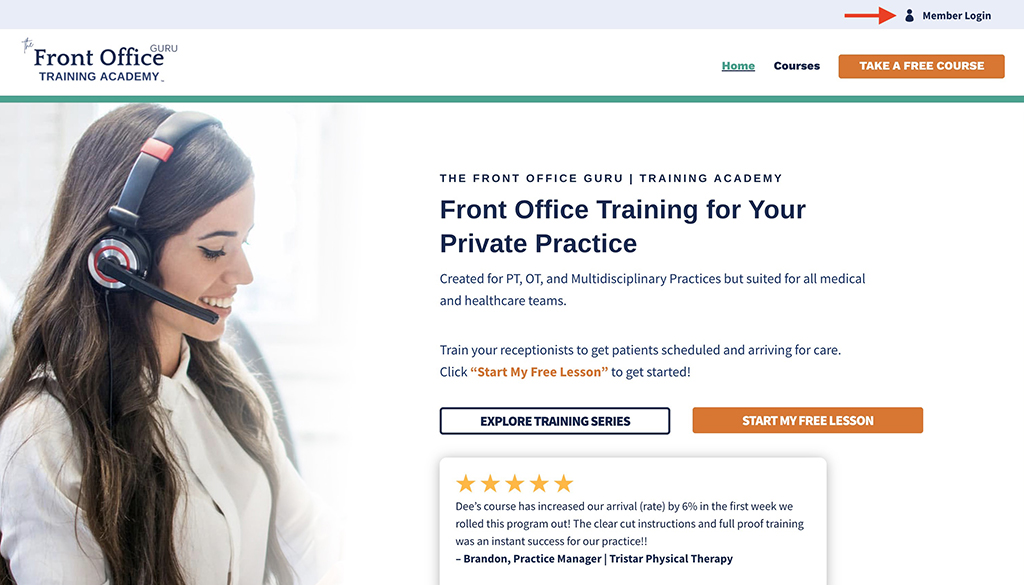
The login link could be found on the upper right area of the website.
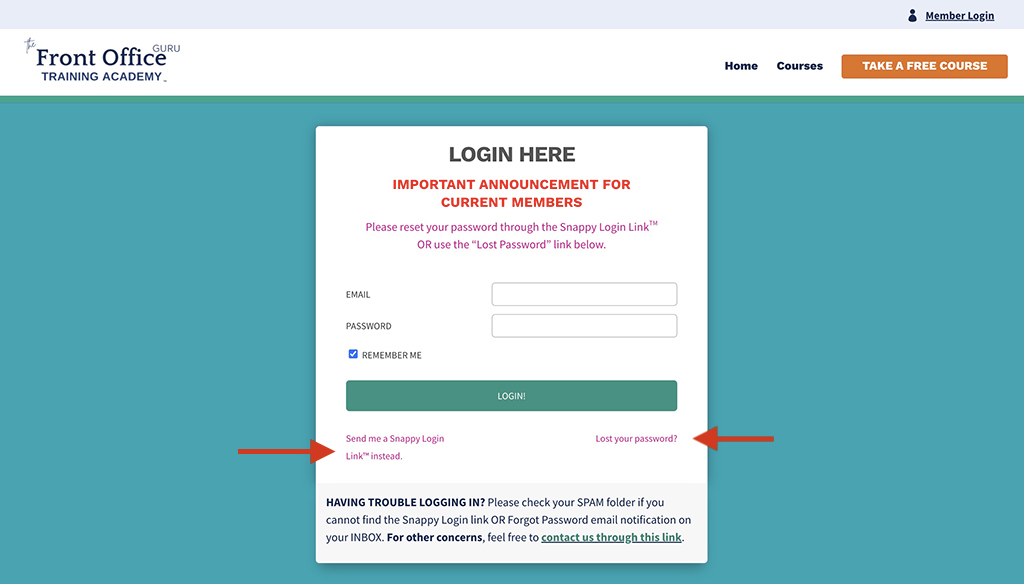
Clicking the login link will bring you to the Login Page.
You can click the Snappy Login OR Lost Your Password link right below the LOGIN button if you forgot your password.
Above: In case you forgot your login password, there are two options to access the course is done by clicking on either the Snappy Login or the Lost your password link.
Logging in successfully will redirect you to the Course Dashboard.
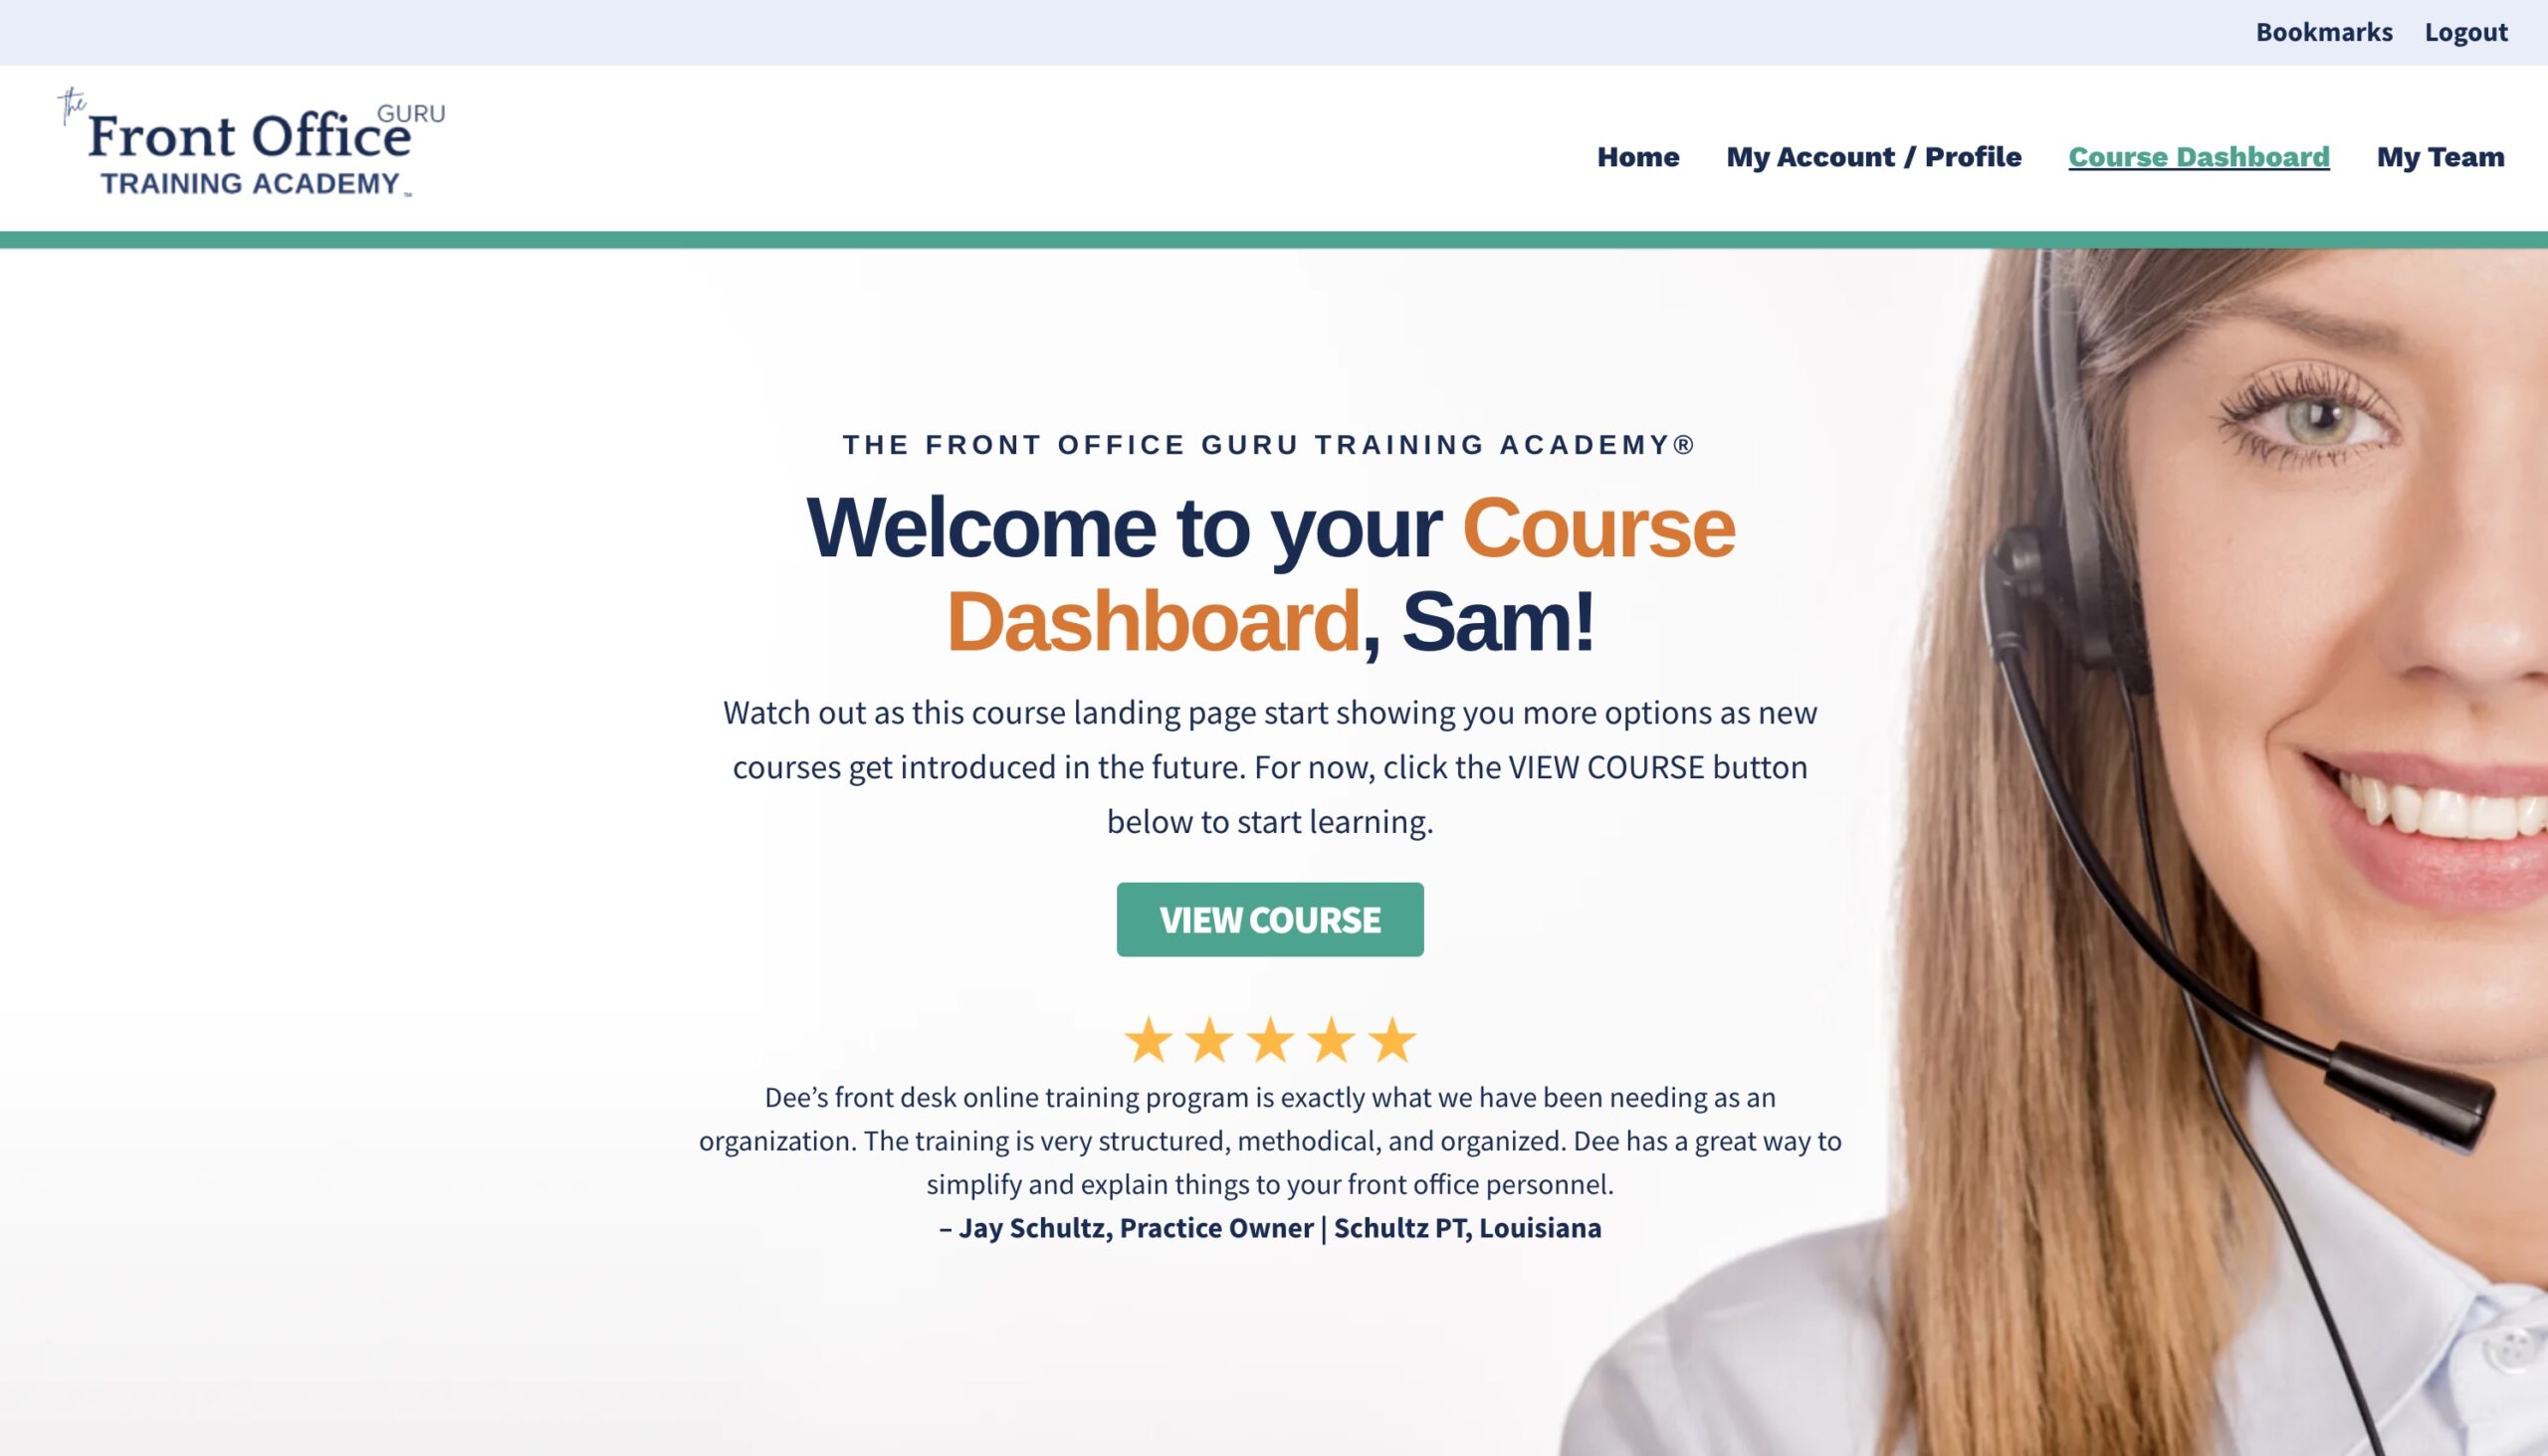
Team Leaders (Owners / Managers) have an additional navigation option (My Team) than Team Members (Staffs) top navigation menu.
Above: Team Leader (Owner / Manager) Course Dashboard
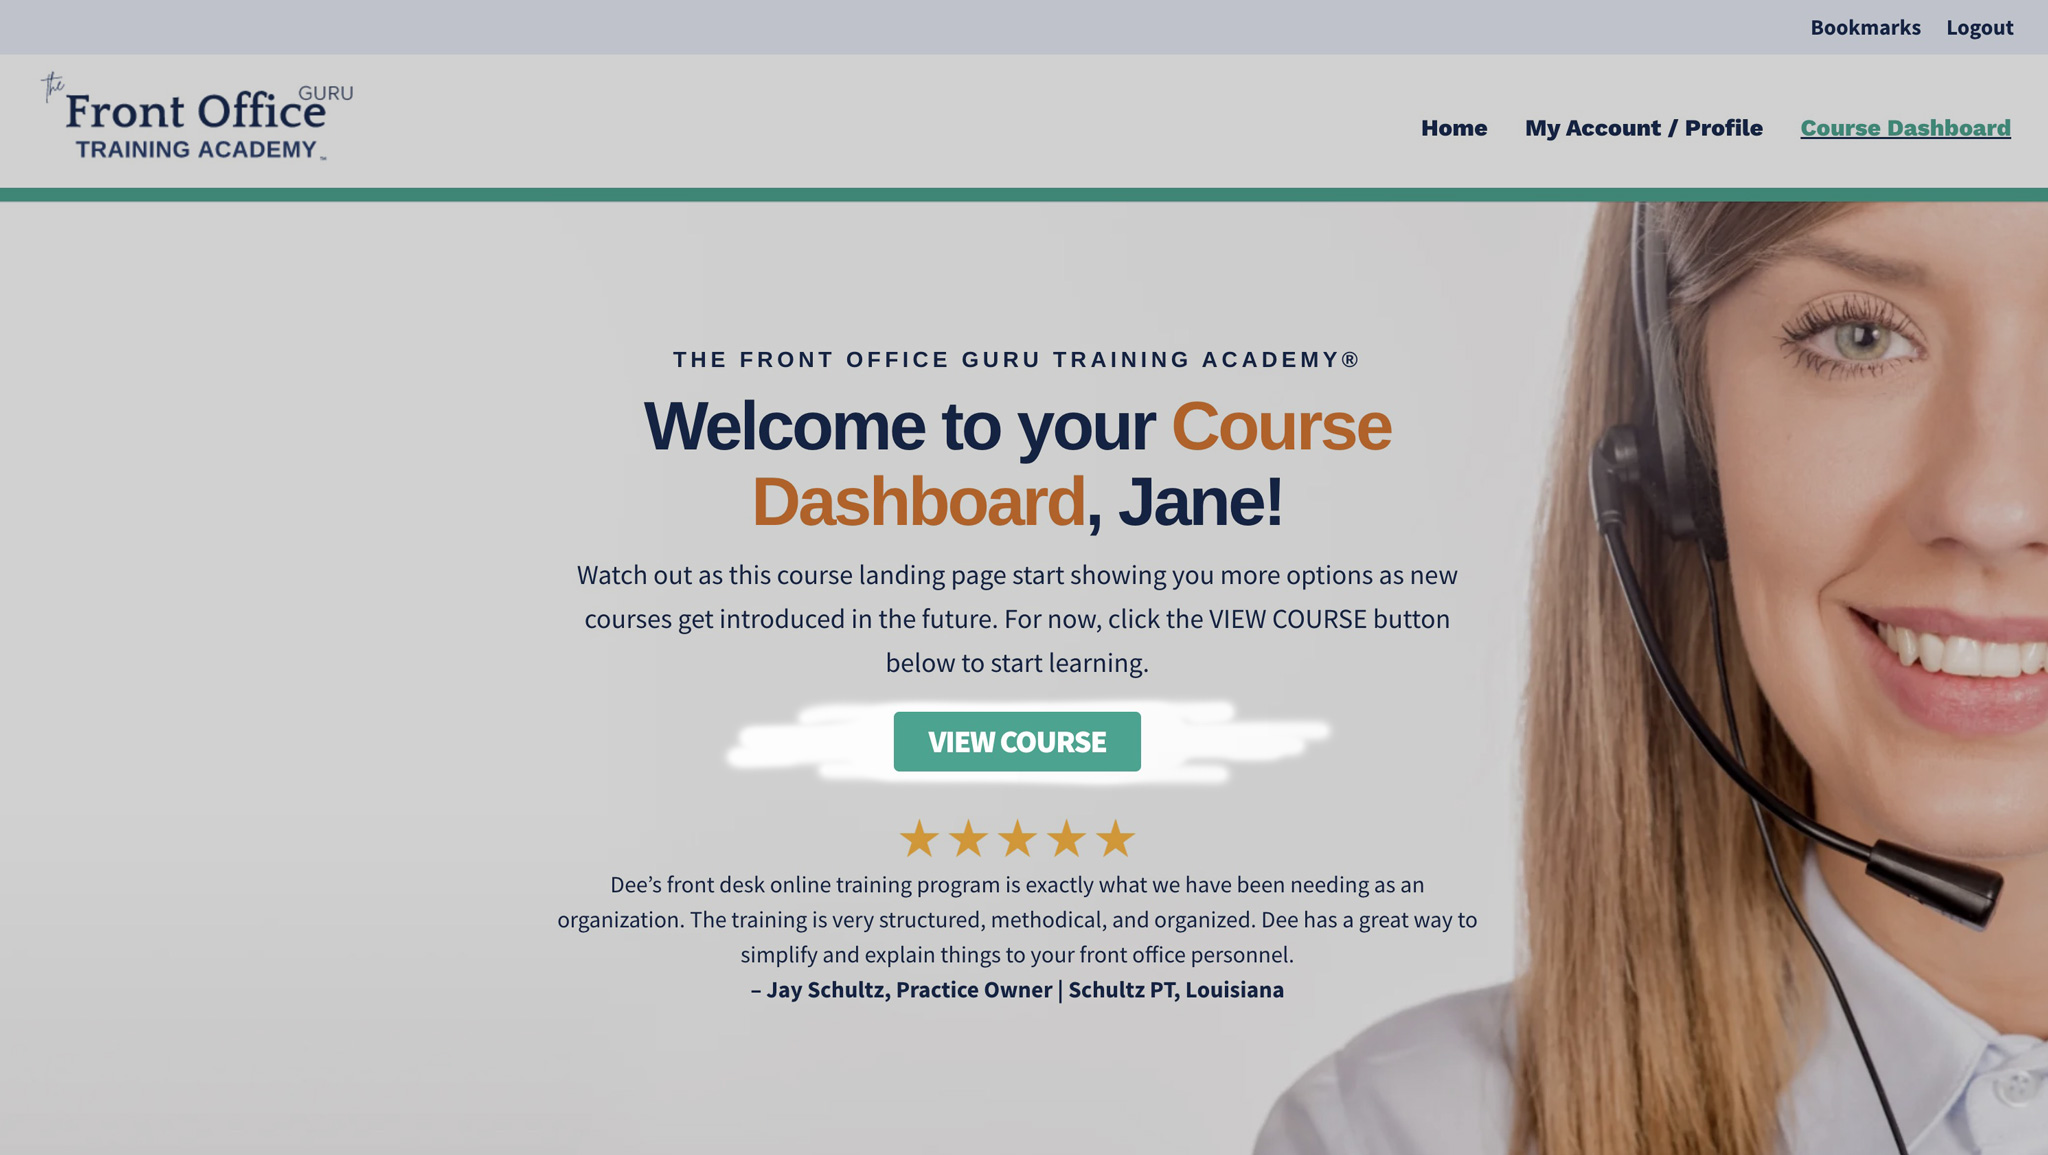
Above: Team Members (Staffs) Course Dashboard
STEP 2. Starting the Course
A VIEW COURSE button will become available once you are on the course dashboard. Clicking this will take you to the Overview page, which will give you some initial guides on how to navigate through the course.
Above: Click the VIEW COURSE button will bring you to the Overview page that will help you start the level.
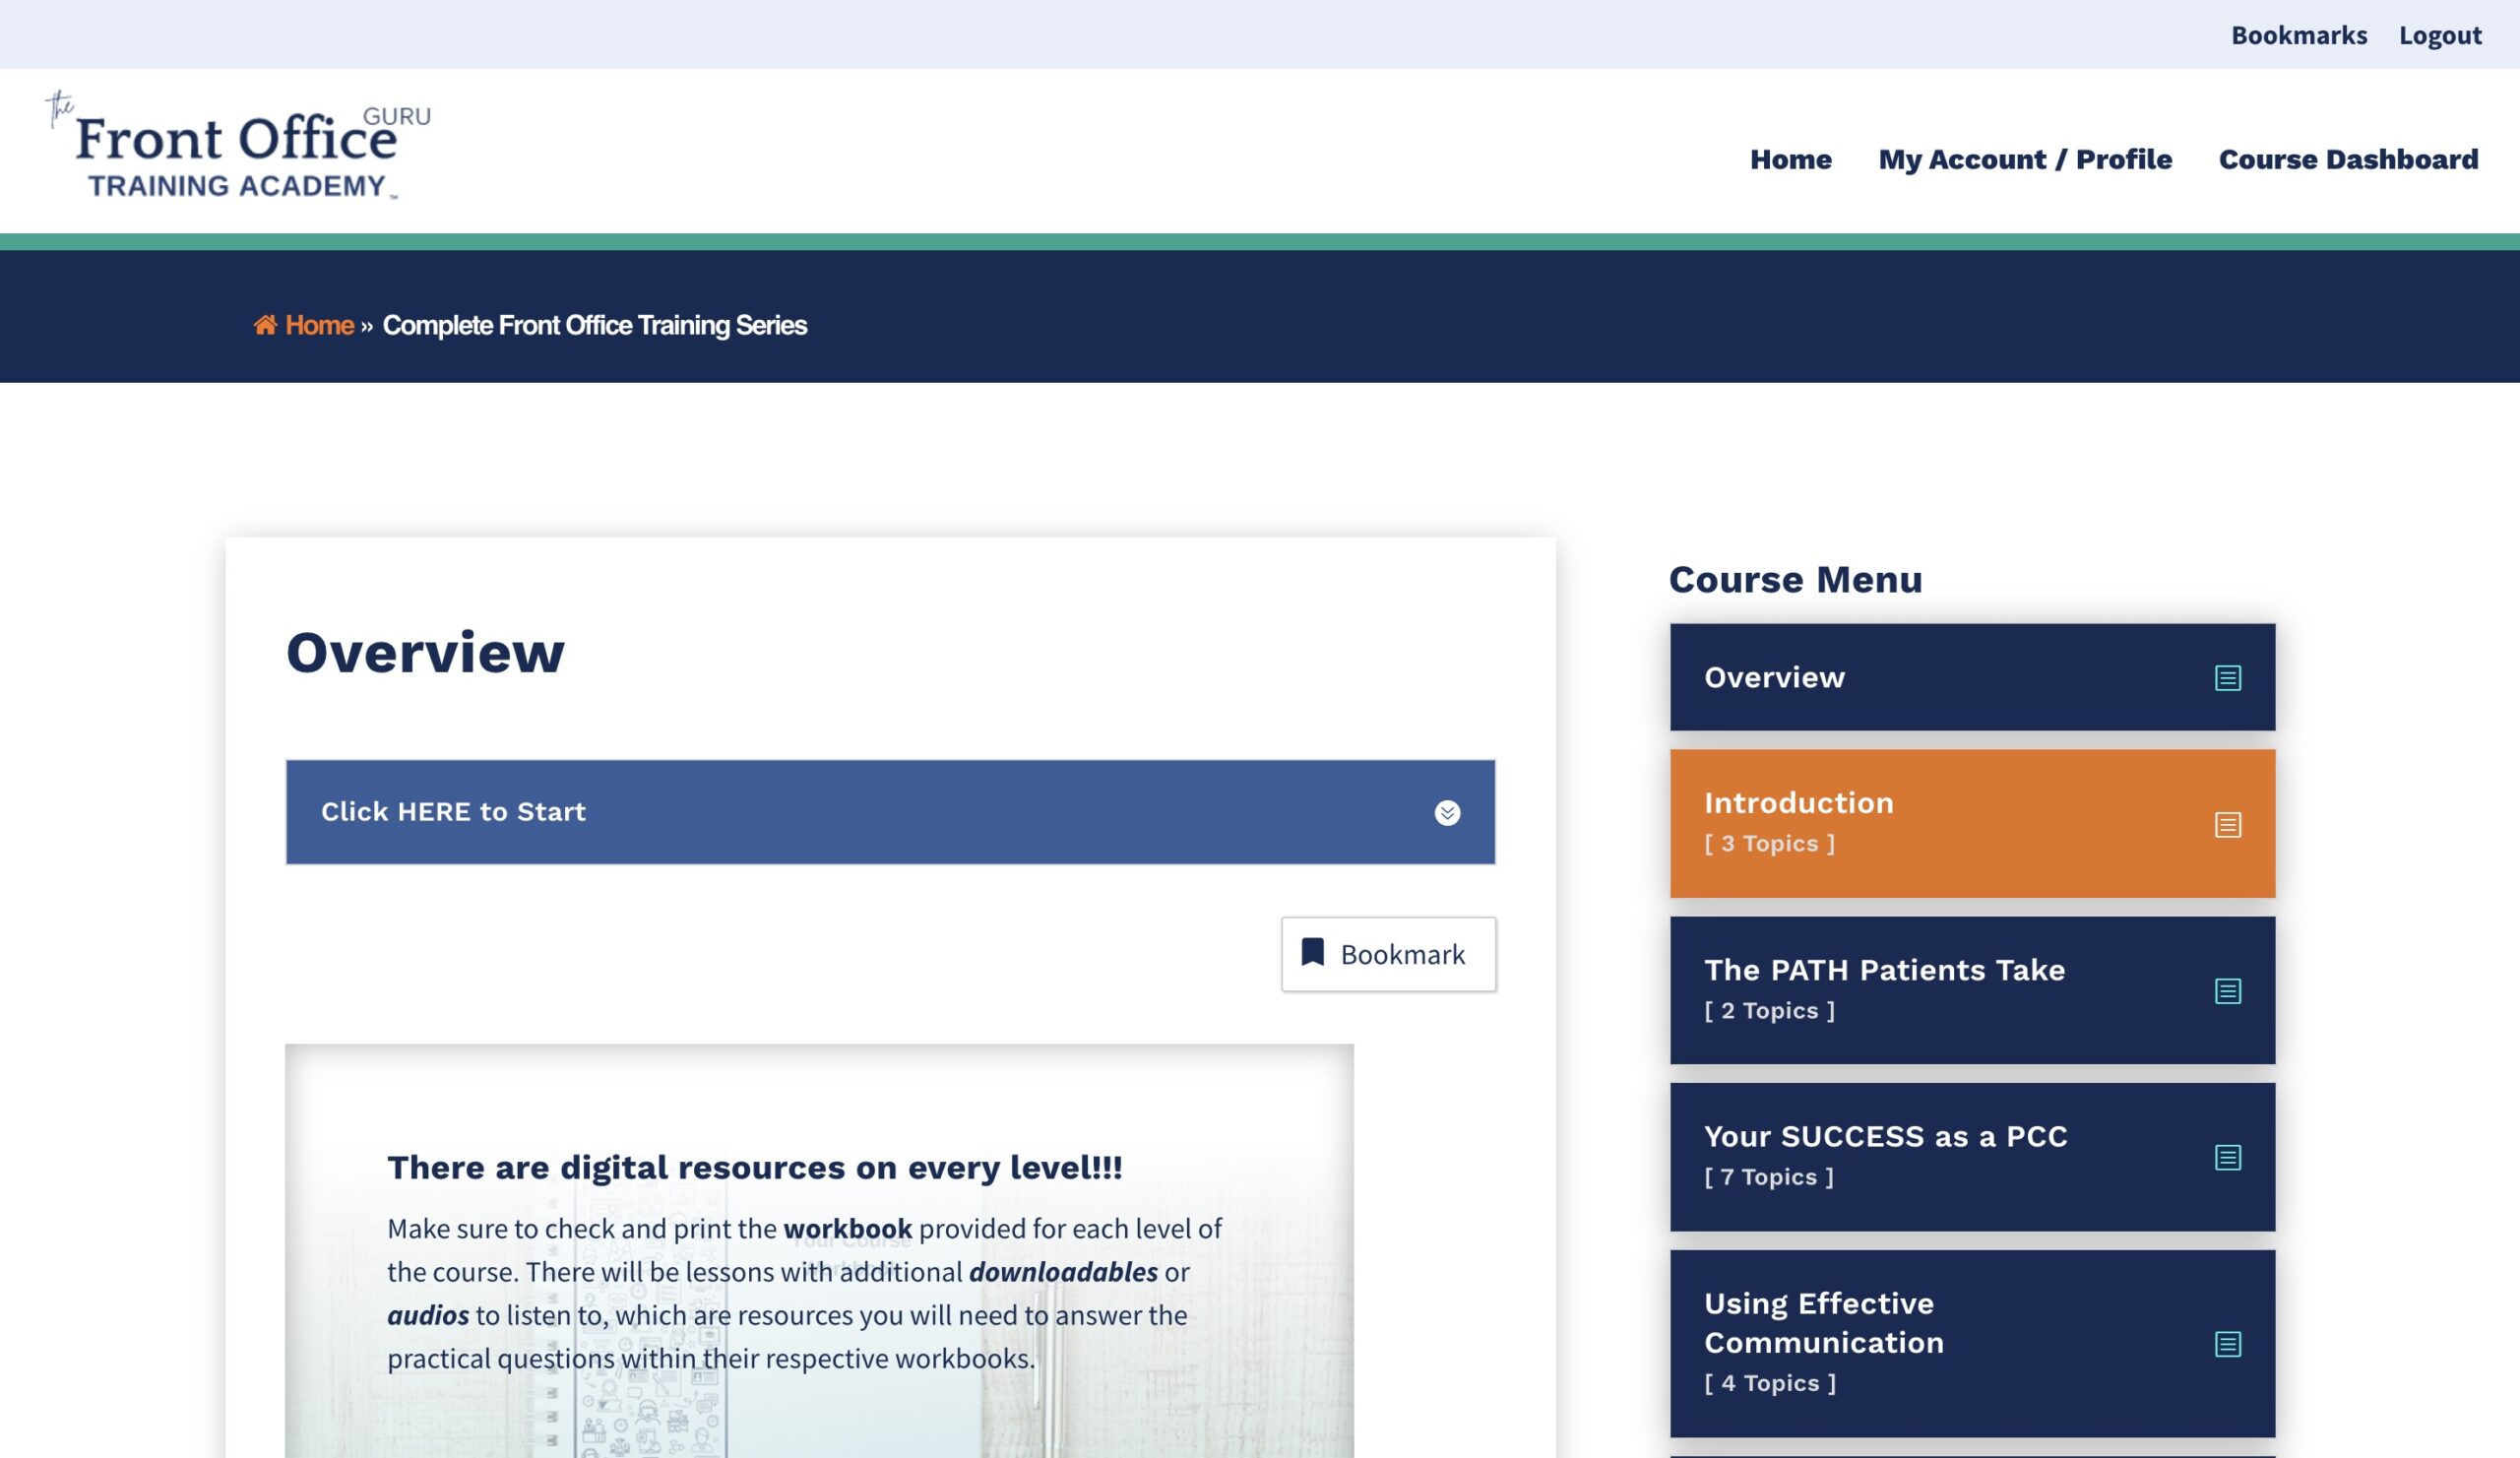
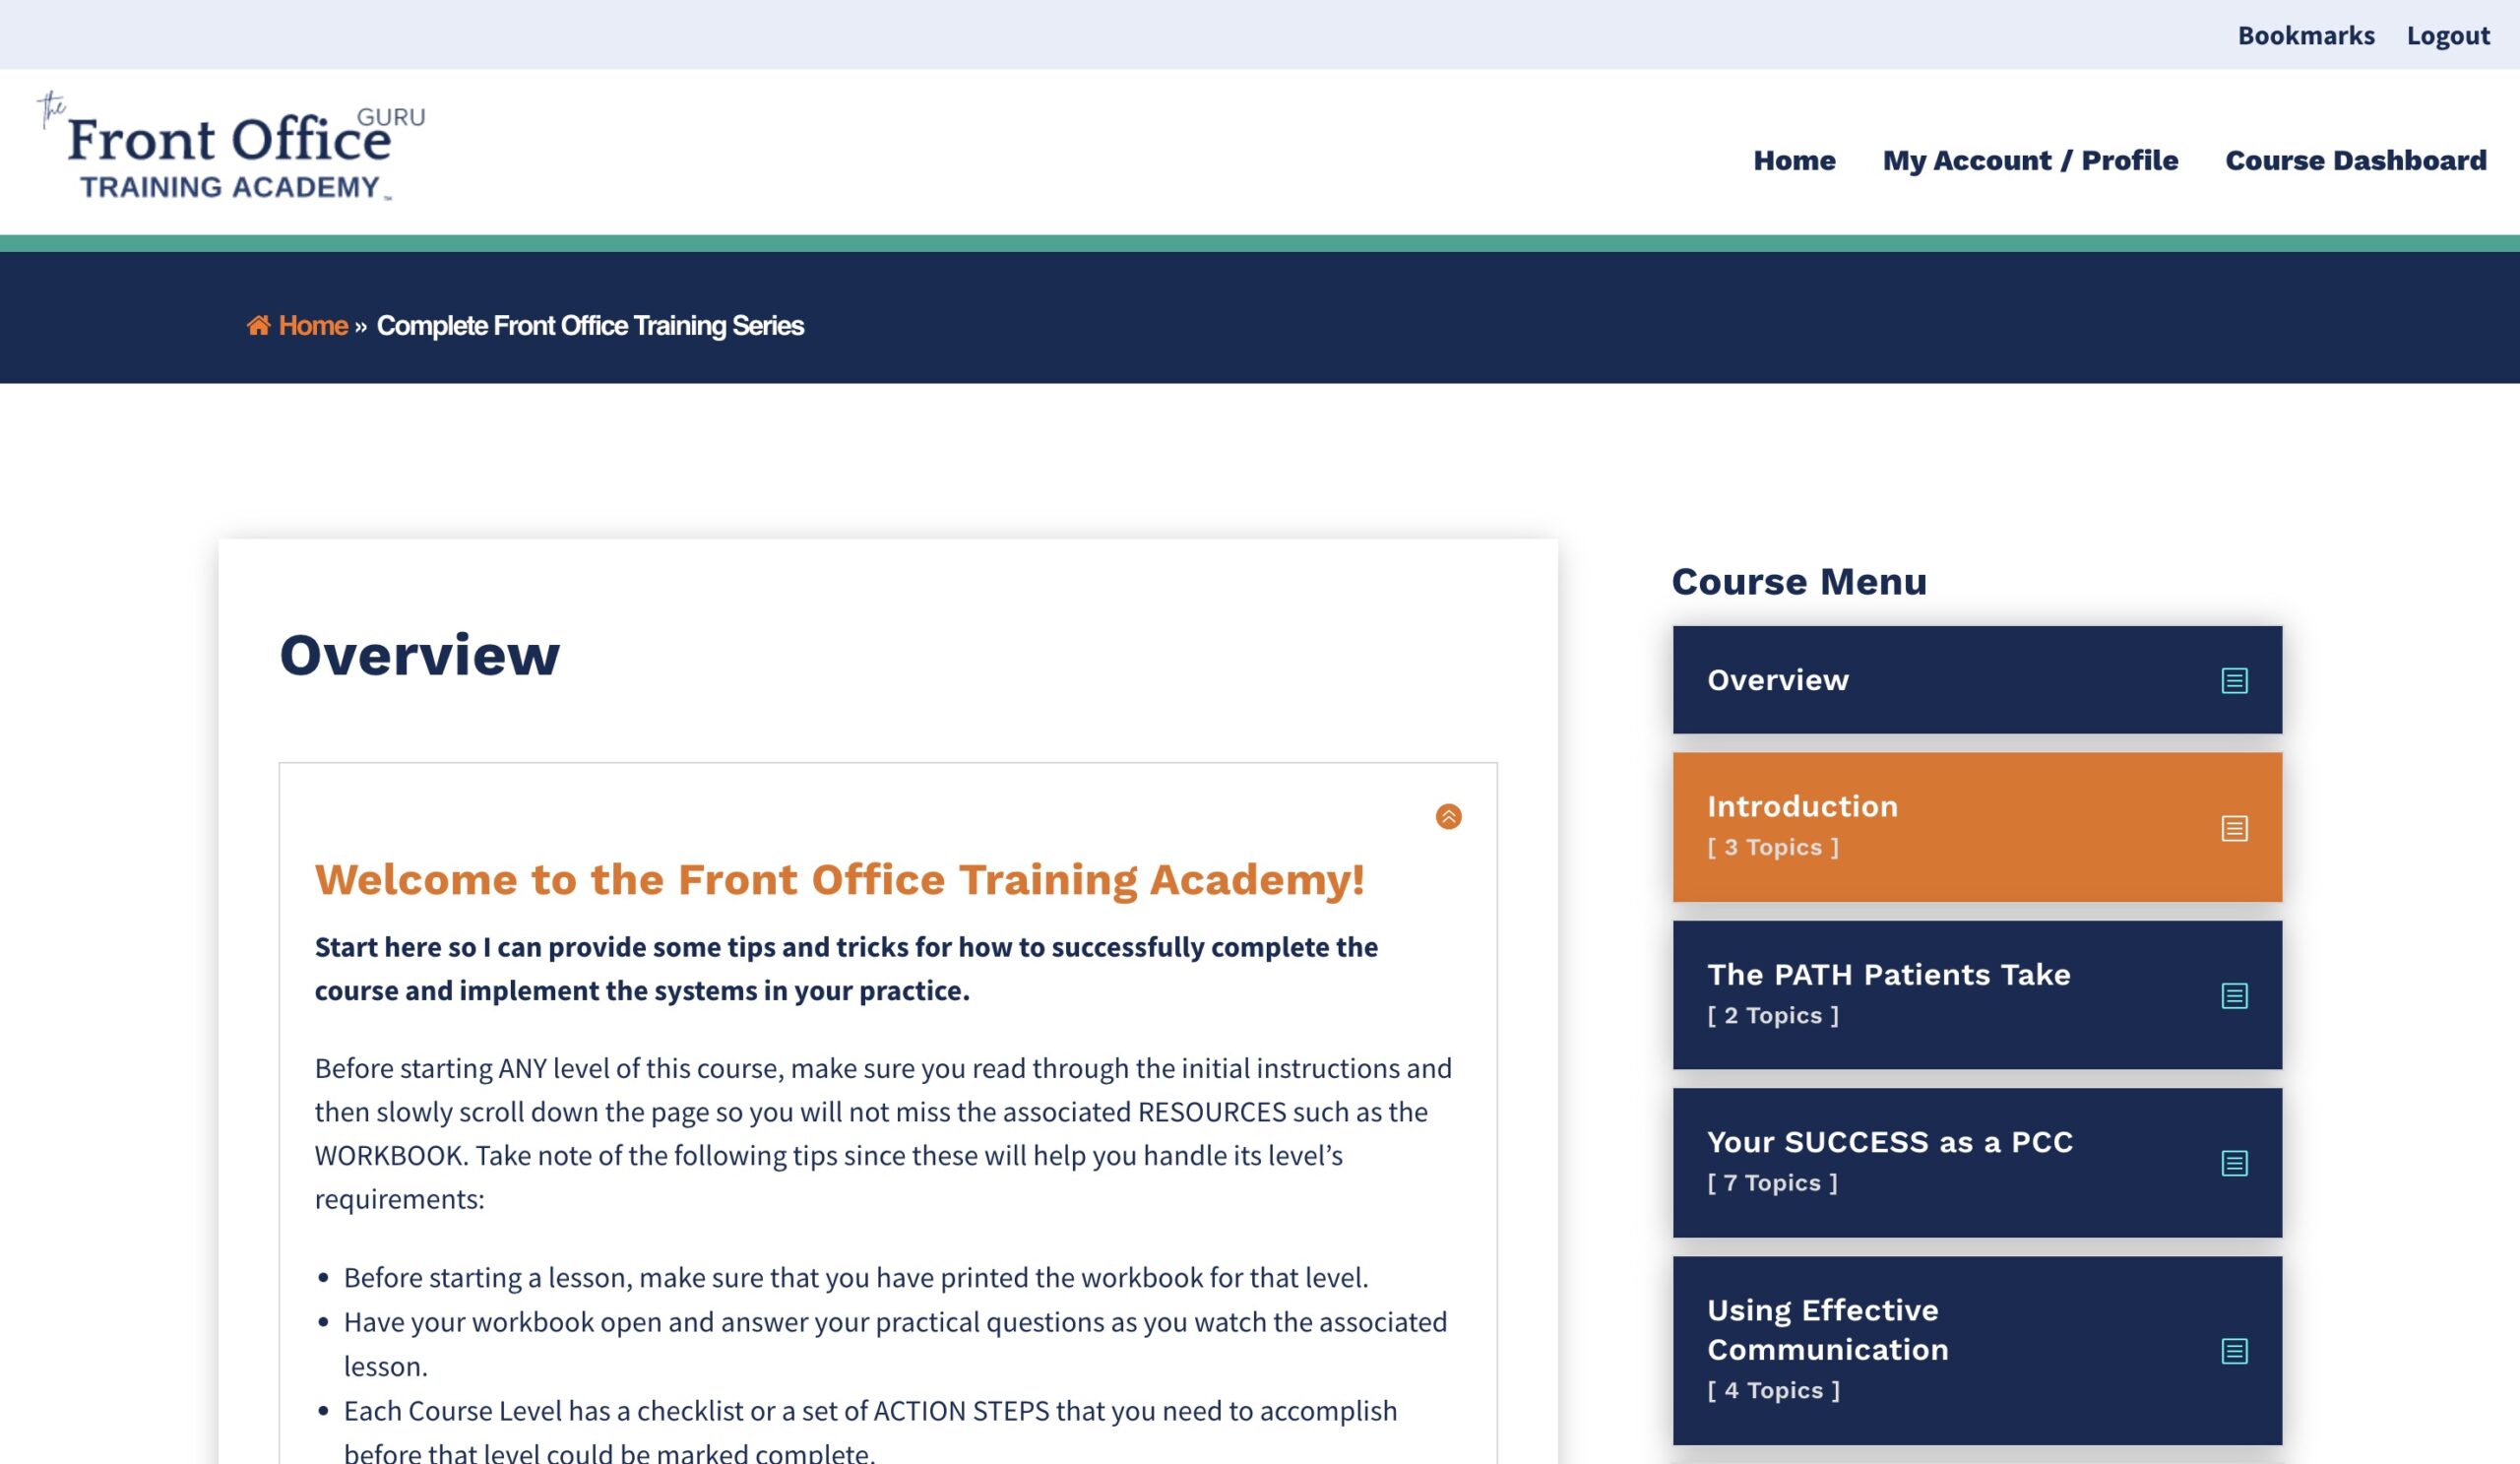
Above: Course overview page. Click the blue bar that says "Click HERE to Start" to open up more contents inside it.
Above: Collapsed "Click HERE to Start" Blue Bar that contains additional beginner instructions.
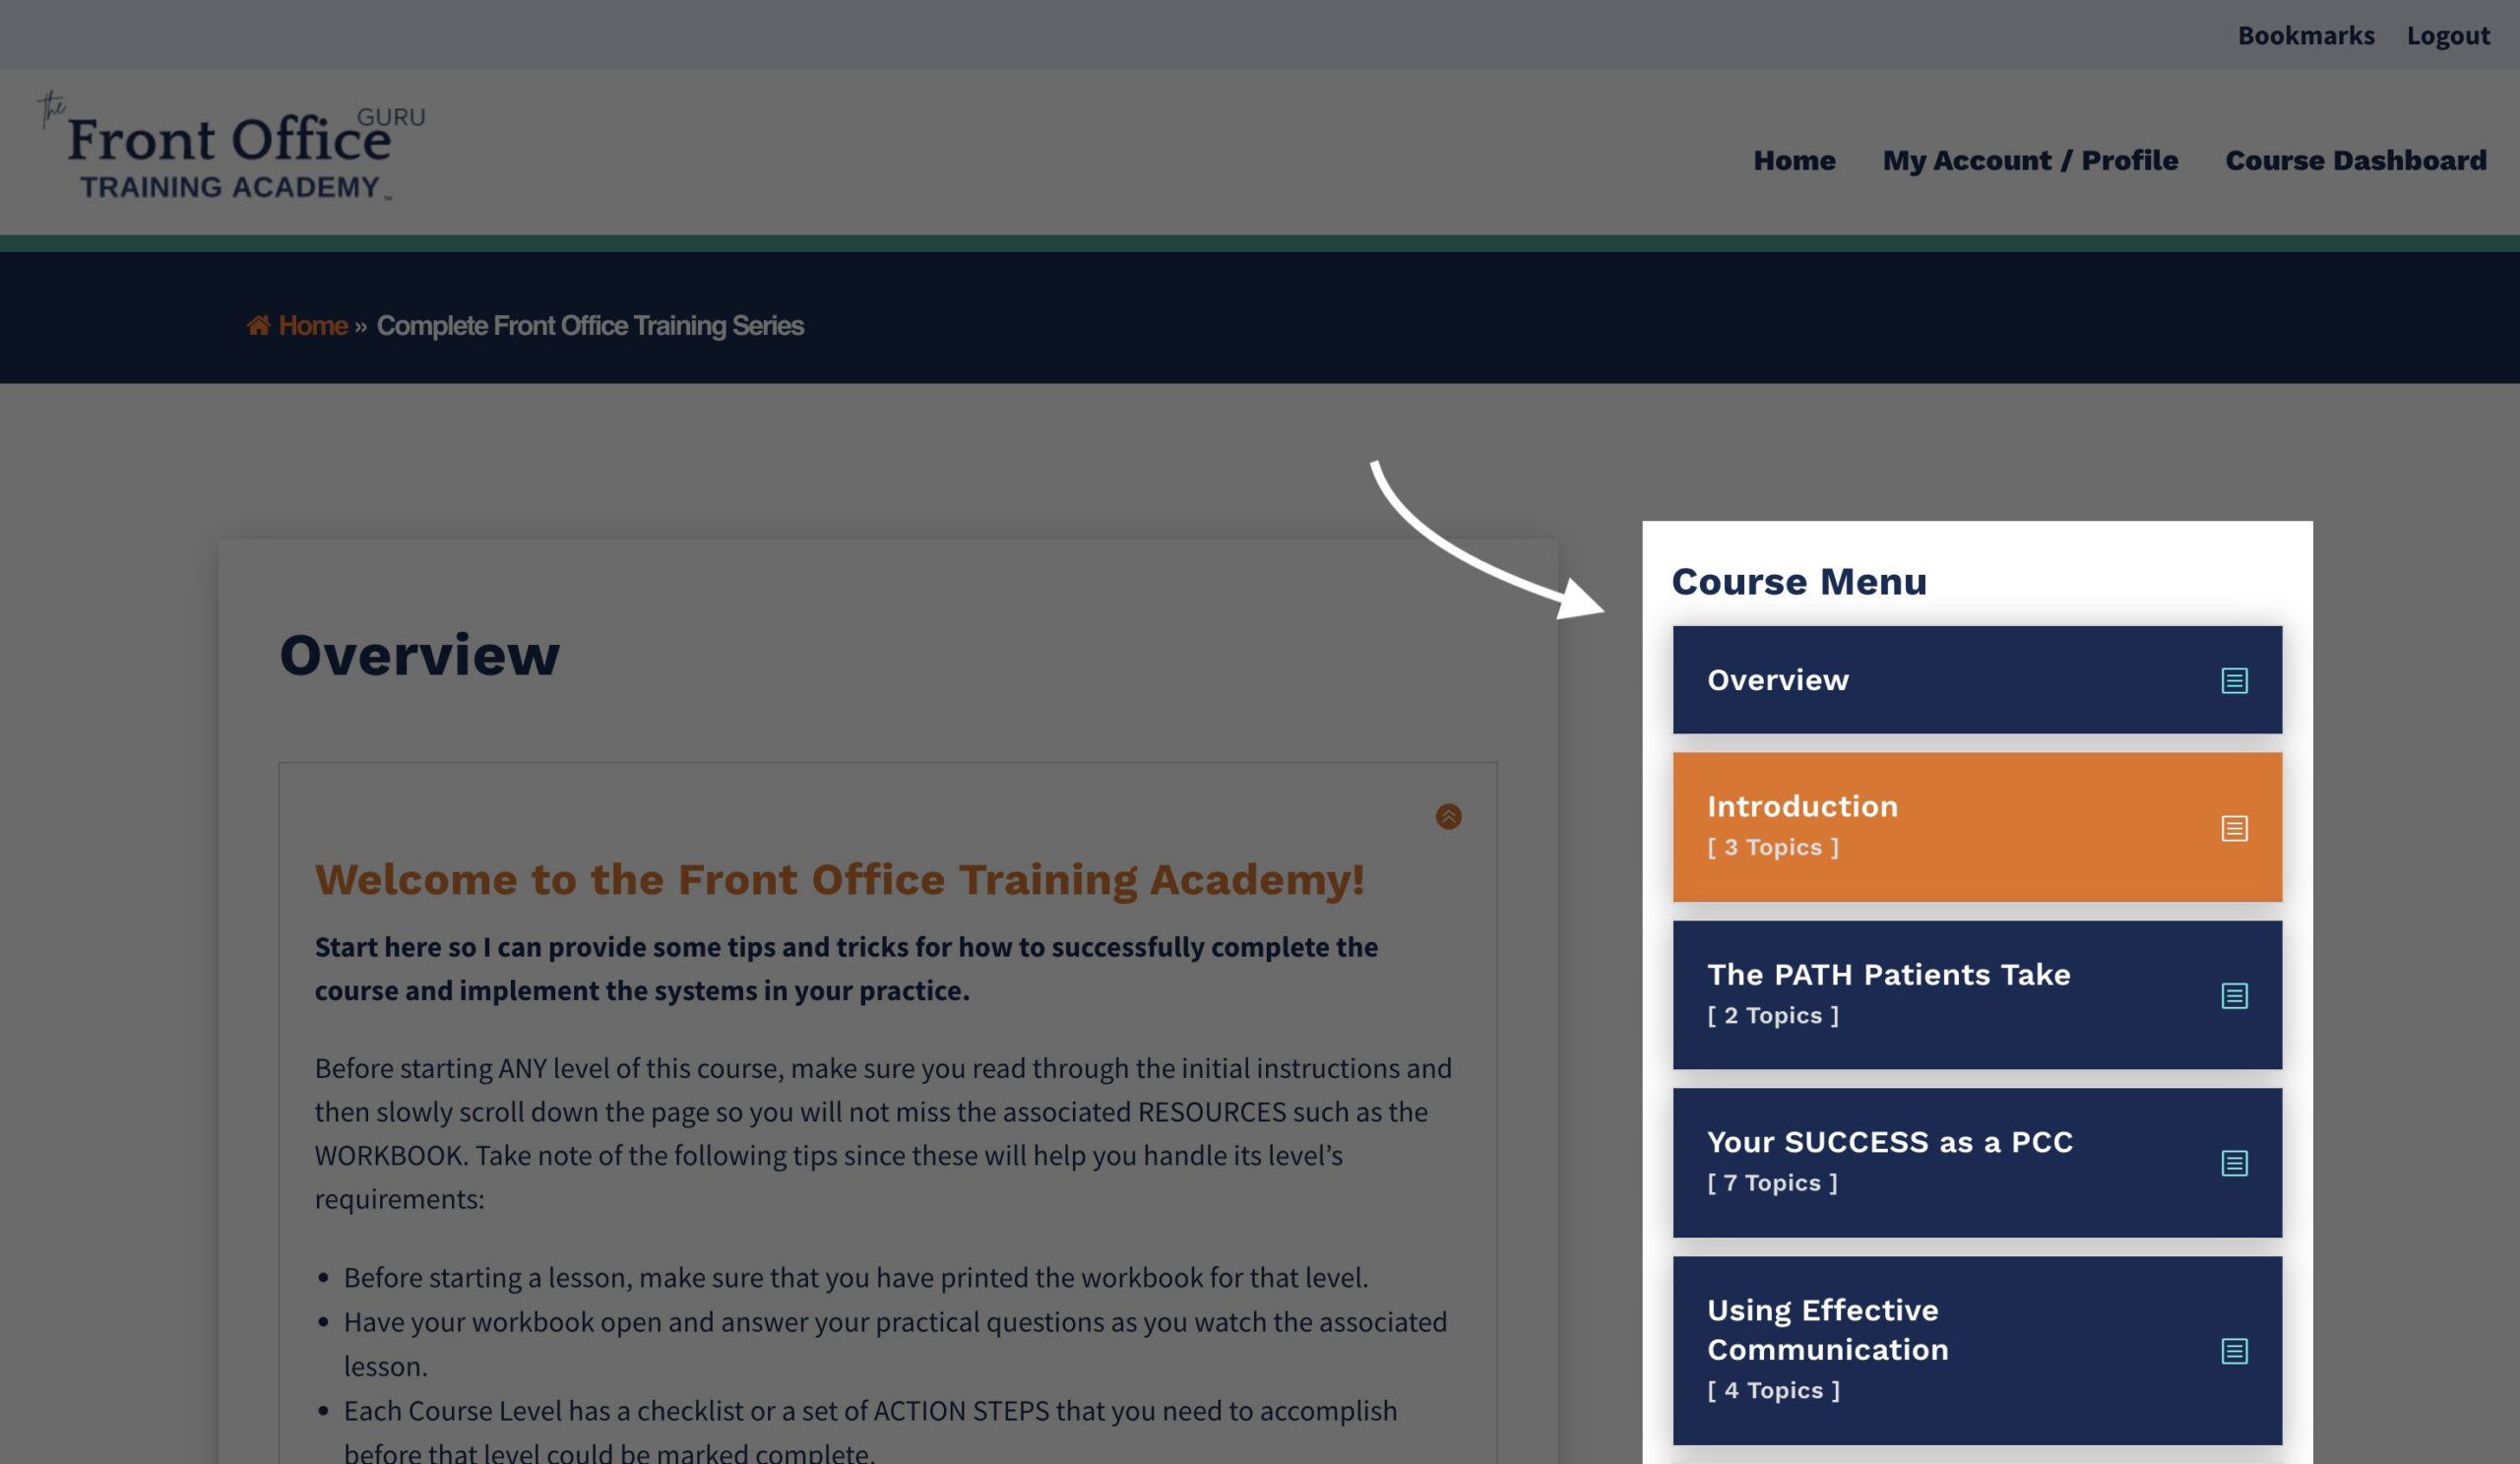
Above: The levels could be taken any way you want, so feel free to choose whichever level you want to take up from the list on the right sidebar.
Click any one of the named boxes to open more options.
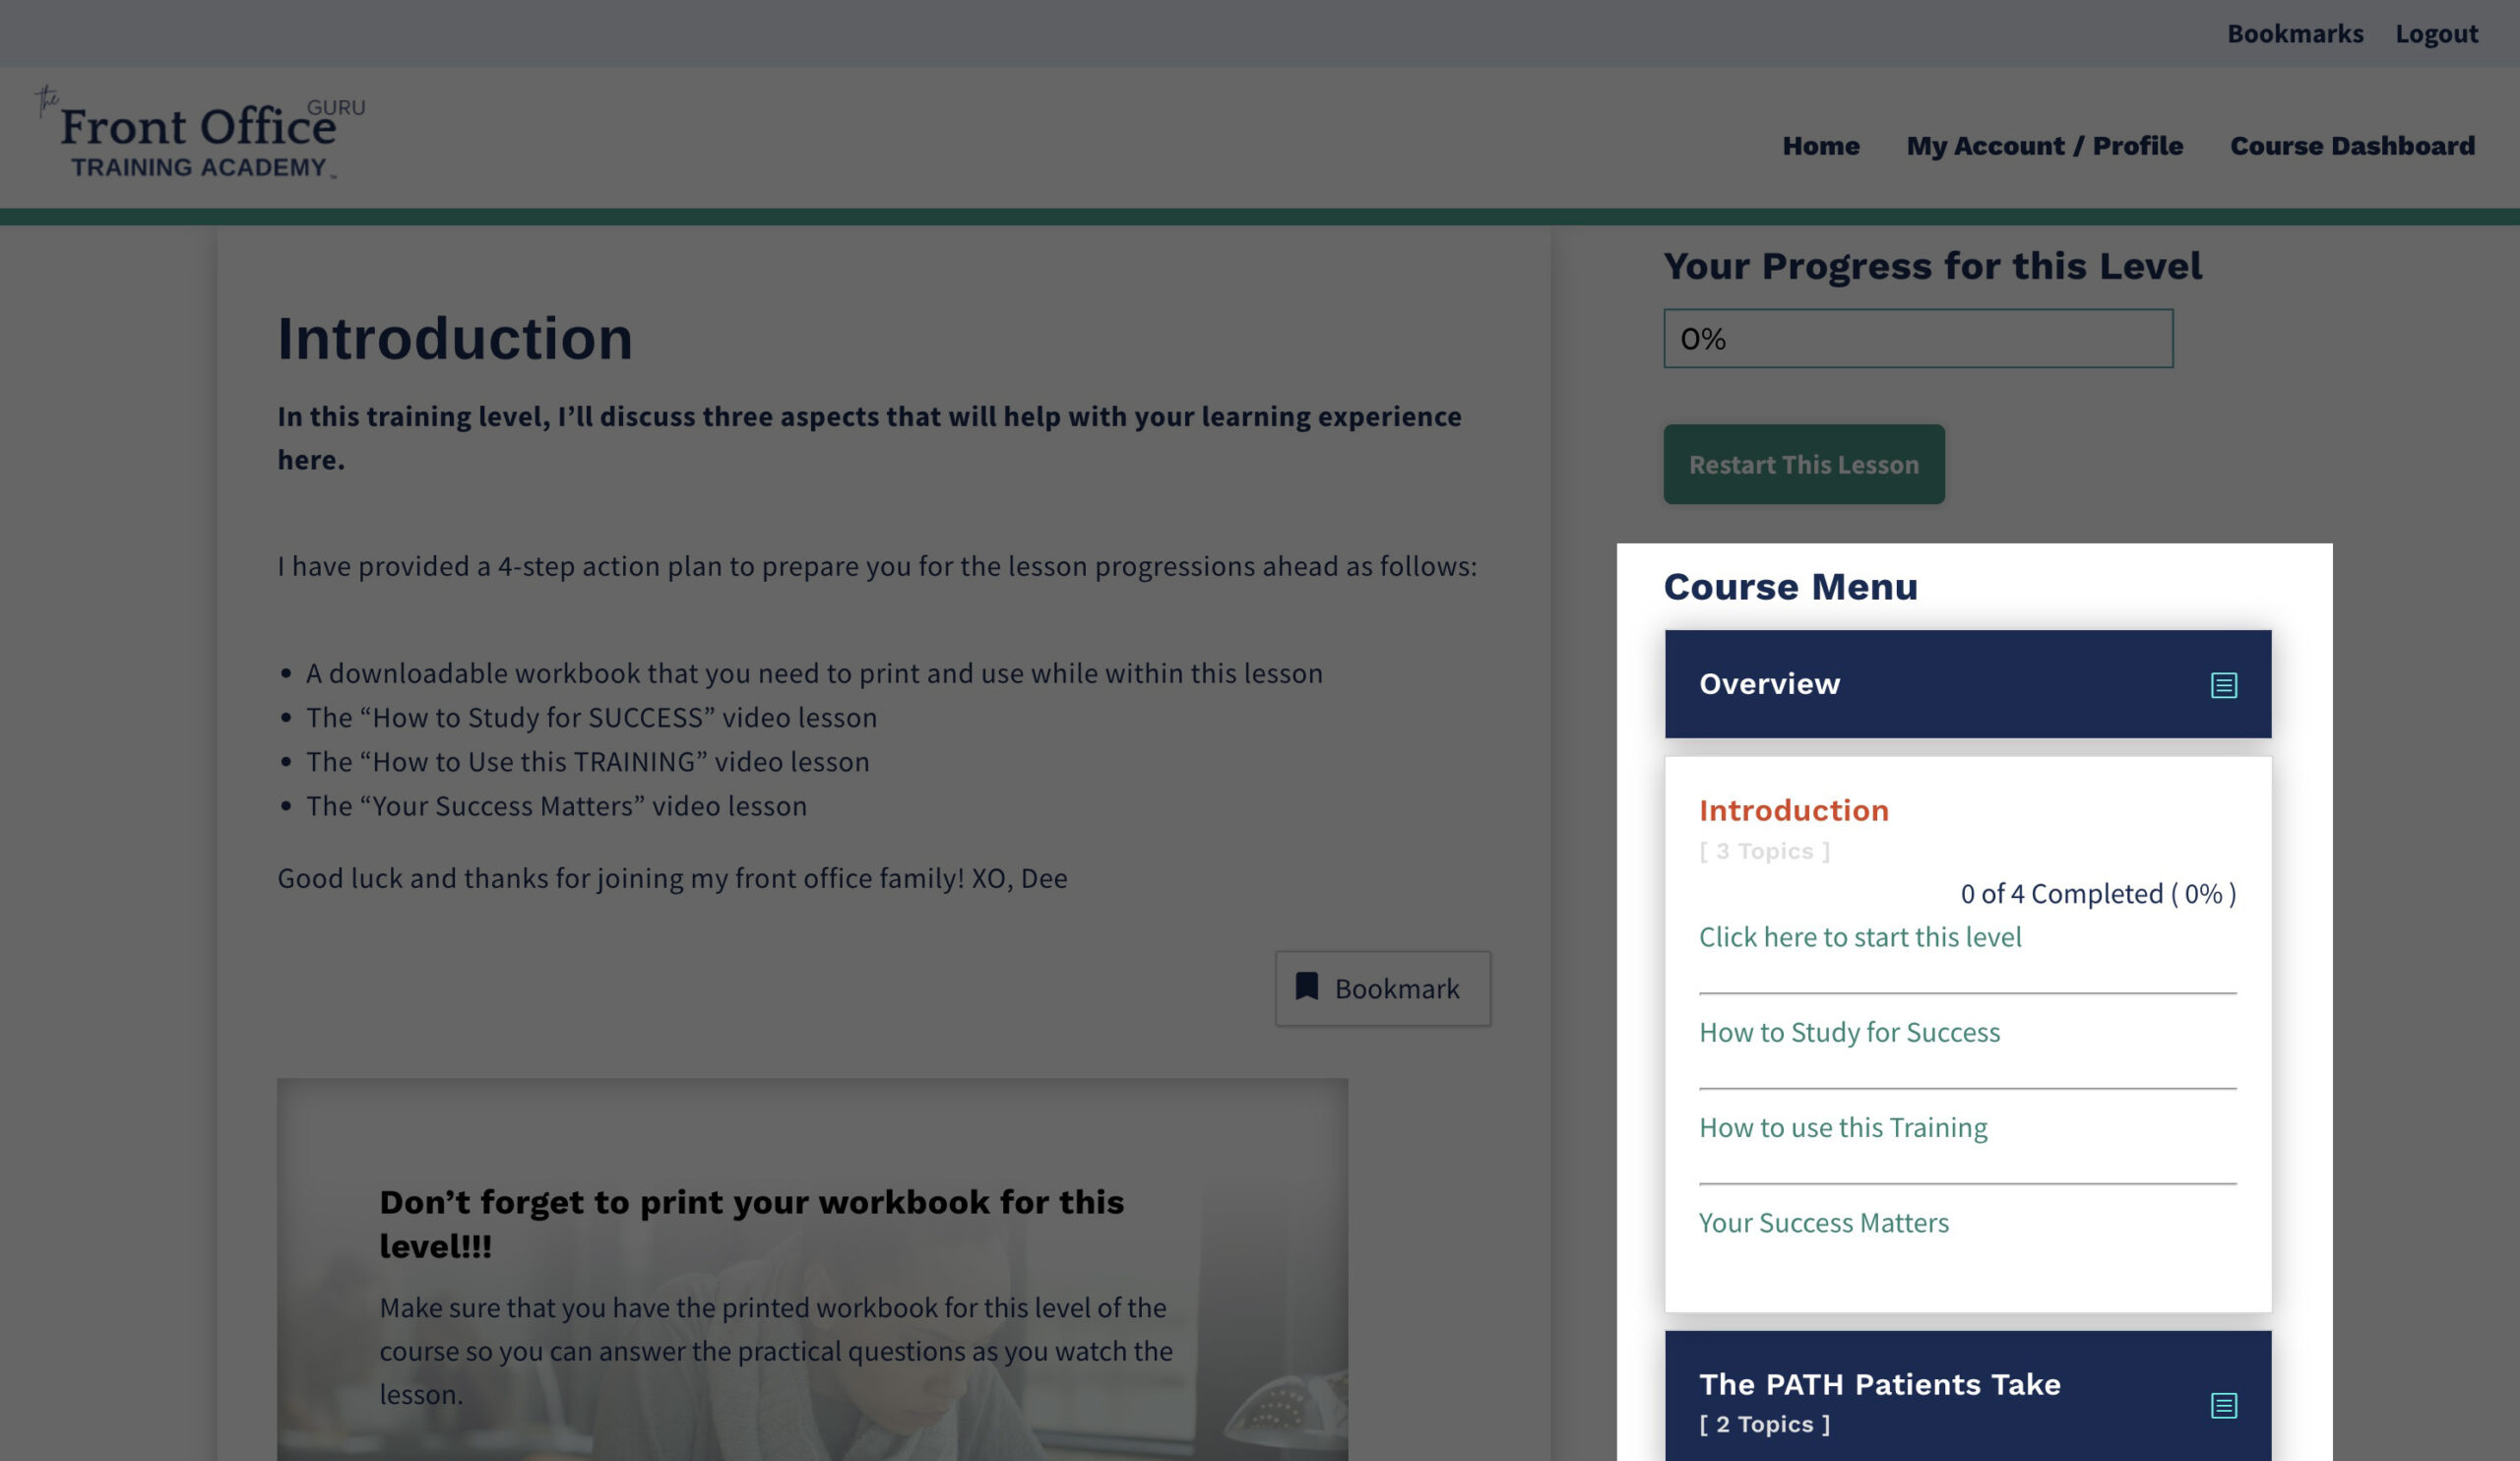
Above: Sample level (Introduction) was clicked and opens up the four (4) sub-items linked - "Click here to start this level", "How to Study for Success", "How to use this Training", "Your Success Matters" - to various areas of the level's page.
STEP 4. Tracking and Resetting Course Progress
Except for the Overview page, each level page have a progress bar above the right sidebar course navigation. A Restart This Lesson button is also found underneath that bar, which will reset your progress for that particular level.
Above: The steps required to complete the Introduction course (shown above) have not been accomplished yet, which is why it shows a zero percent (0%) progress.
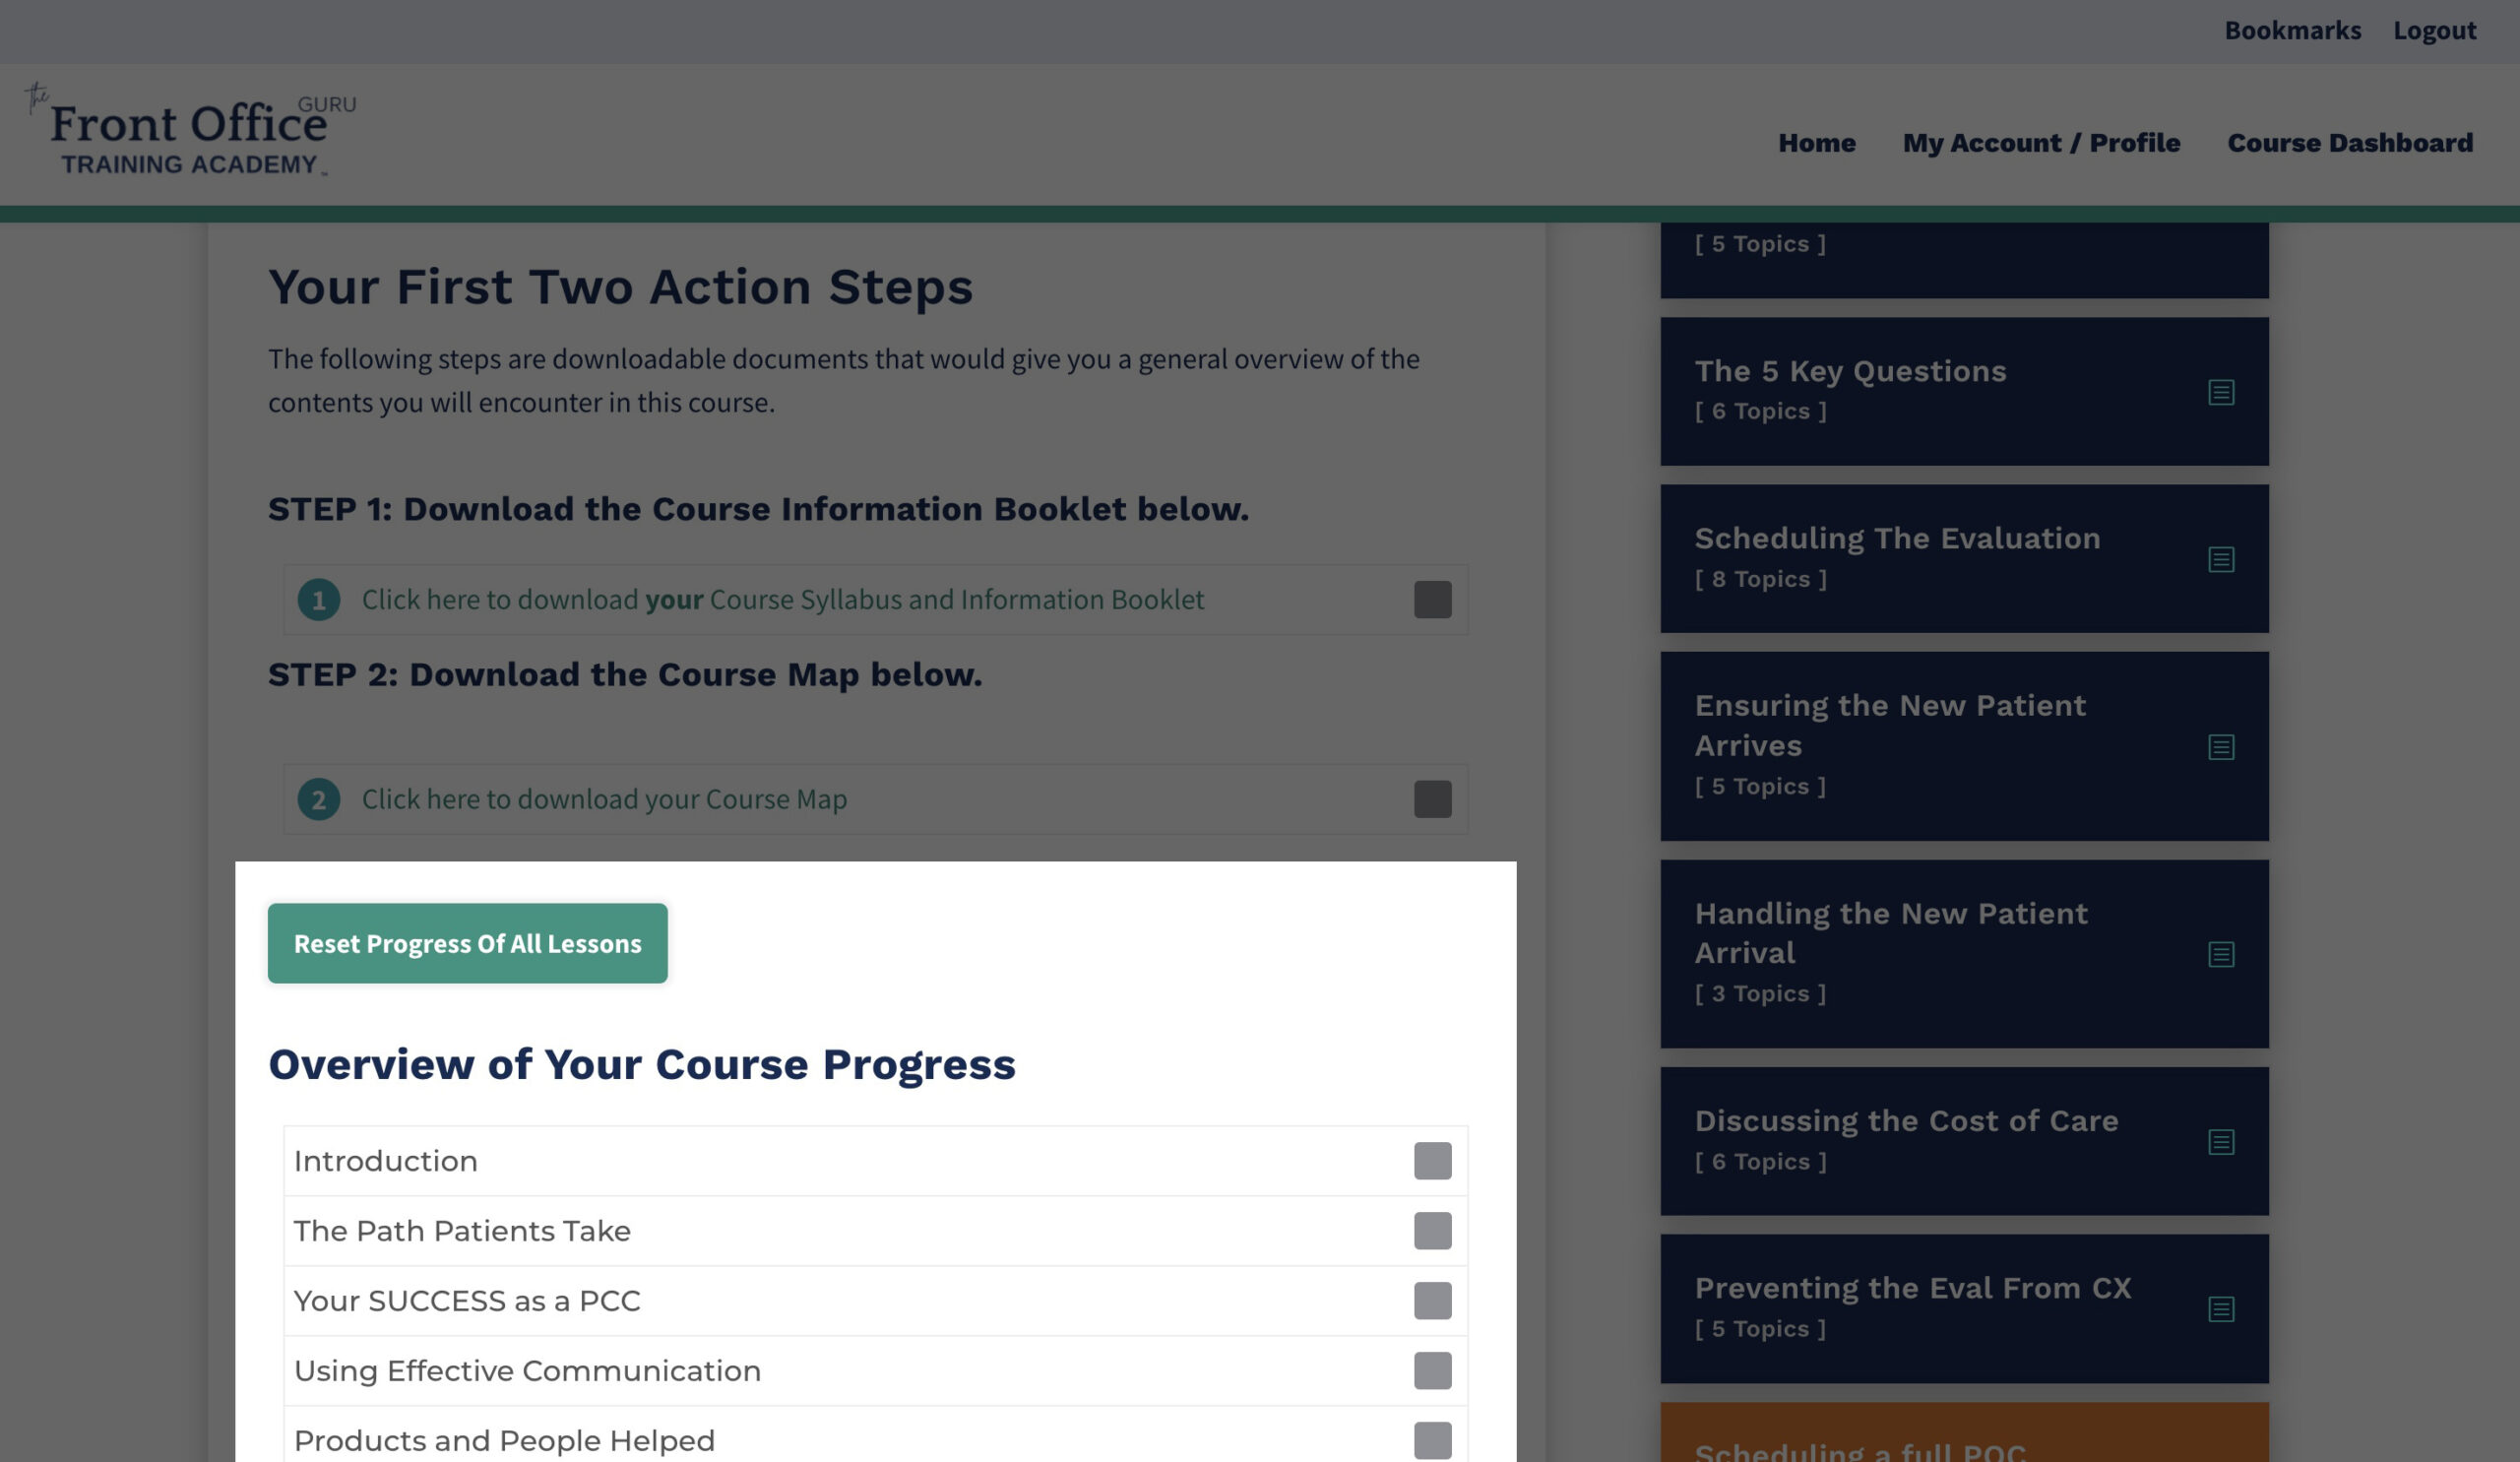
Above: The lower area on the Overview page will show you the list of levels that you have completed. Above that list is the button that will reset all the course progresses you have made. WARNING: Resetting progress cannot be undone.
Congratulations!
You have reached the end of this guide.
Feel free to review each of the steps above or
proceed to the other guides below.
QUICK ANSWERS TO FREQUENTLY ASKED QUESTIONS
CLICK HERE IF YOU ARE JUST GETTING STARTED
Taking up the course (or any future courses) is easy.
Just click on the COURSES link on the top navigation menu (directly linked here) and it will redirect you to the Courses page that lists down what is currently available.
The courses are laid out and configured to make your learning experience as exciting and easy as possible. You will notice that each level of the course follows the same layout format as the rest to help you quicly familiarize with this learning system.
You should be able to -
- track your over-all course progress (at the lower area of the Overview page for that course)
- easily identify the navigation to reach and jump to other lessons (via the right sidebar menu),
- have a way to track your progress for each course level (above the right sidebar menu),
- have a way to bookmark levels that you want to quickly reach (on the top area of the lesson contents for that level),
- and navigate to previous and after lessons that are right next to the one you are viewing at any given time (at the bottom of the lesson contents for that level).
Click here if you want a more detailed visual guide of this process.
WHY IS MY COURSE PROGRESS GONE?
Our team migrated the course progress of all members last February 23, 2023 in preparation for other aspects required to have a smoothest transition possible into this new learning management system.
Technically, this meant transferring over 33,300 database entries (where each entry corresponds to one requirement to complete a lesson).
Thus, if you logged in and took any level of the course after our February 23 migration, then your progress was not recorded just on this new system just yet.
NEVERTHELESS, there is nothing to worry about. We are currently working on restoring the course progress from that date up to the present for those who accessed the within that one-month period (more or less).
If in case you want to expedite this process for your account, please do not hesitate to contact us via our Customer Support form.
IMPORTANT: Please note that there are levels that have been modified so that the previous outline of contents and requirements to complete were not the same anymore as the old course site.
These could be (1) downloadable documents that were previously not flagged as requirements to complete but were being tracked now or (2) audios to listen to, which were previously offered as downloadable audio files.
This means even if you have completed those levels in the past, you will find them to still be incomplete on this new system.
HOW DO I RESET MY COURSE PROGRESS?
QUICK ANSWER: Each level has a RESTART MY LESSON button on the upper right hand area of the page. Clicking this will permanently erase your progress for that level so you can start anew.
I FORGOT MY PASSWORD, WHAT SHOULD I DO?
OPTION 1: The first one is by using the Snappy Login Link™ system.
It is a clickable link on the Login page (directly linked here), right below and to the left of the LOGIN button.
Simply click that link that says "Send me a Snappy Login Link™ instead" and it will redirect to a form that will ask you to fill up your email address.
A special link will then be generated and sent to your email address.
Clicking that link from the email you receive will allow you to login without supplying your password.
OPTION 2: The second way is by clicking the Lost your password? link found to the right of the "Send me a Snappy Login Link™ instead" text link or to the right and below the LOGIN button on the Login page.
Once clicked, it will redirect to a form that will also ask you to fill up your email address. That email will contain a link that you need to click to be able to change your password.
OPTION 3: If all else fails, then please send us a customer support request (through this link) and we will send you a temporary password to log you in at the earliest time possible.
HOW DO I LOGIN EVEN WITHOUT A PASSWORD?
It is a clickable link on the Login page (directly linked here), right below and to the left of the LOGIN button.
Simply click that link that says "Send me a Snappy Login Link™ instead" and it will redirect to a form that will ask you to fill up your email address.
A special link will then be generated and sent to your email address.
Clicking that link from the email you receive will allow you to login without supplying your password.
HOW DO I RESET MY PASSWORD?
If you are currently logged out, resetting your password could be done by clicking the Lost Password link from the Login page (directly linked here), right below the LOGIN button.
If you are logged in, resetting your password could be done by clicking the My Account / Profile on the top navigation menu item or you could access it directly by clicking this link. Doing so while logged in will require that you supply your current password and the new password that you have chosen.
WHERE DO I FIND MISSING EMAILS FROM YOU?
Once there, you should try searching for the following strings:
- Dee Bills
- Front Office GURU
- Snappy
- Login link
- Password Reset
- Any other keyword you want to look for from my emails to you.
Make sure to also double check the dates to find the one most appropriate to your search query.
OPTION 2: If you are using a different email app (like GMAIL), chances are they also have a search box that you could use in the same manner.
OPTION 3: There is this common scenario where email applications tend to move certain emails into the SPAM folder - depending on the way the app's security measures are defined. That said, it is always a good habit to check your SPAM folder if you cannot find a missing email.
OPTION 4: In certain strange cases, some emails go to the JUNK folder, so please try looking there as well.
OPTION 5: If all else fails, feel free to send us a customer support request via this link.
HOW DO I UPDATE MY ACCOUNT DETAILS?
HOW TO ADD A STAFF TO MY TEAM
QUICK ANSWER: Click on the My Team link above (or click here) to access the Team Management page. Once inside that page, you will find two links that say MANAGE TEAM and ADD MEMBERS. Click on the ADD MEMBERS and it will open up a form that you can use to add the staff of your choice.
NOTE: We are still working on a more detailed visual guide of this process.
HOW TO REMOVE A STAFF FROM MY TEAM
Click on the My Team link above (or click here) to access the Team Management page. Once inside that page, you will find two links that say MANAGE TEAM and ADD MEMBERS.
Click on the MANAGE TEAM link and it will show you the list of staffs that are part of your team.
Find and click on the name of the staff member that you want to remove and you will be shown two buttons - "Assign as Team Manager" button and "Remove" button. Click the REMOVE button to permanently disconnect that person from your team account on this website.
HOW TO INCREASE MY TEAM SEATS
IMPORTANT: This option is only available to Team Owner (Leader)
Click on the My Team link above (or click here) to access the Team Management page. Once inside that page, you will find the Increase Team Seat options on the right sidebar (on desktop) or at the lower area when viewing from a mobile device.
Click on any of the three Increase Team Seat boxed options. You could increase your team seat by 1, 2, or 4 at a time. Adding any other number of seats would require redoing the process and choosing a combination of any of those available options.
You will find a BUY NOW button on each of the three available options. Clicking it will start the payment process.
Once done, you will find an "Access Team Management Dashboard" link that will bring you back to the Teams dashboard where you will be able to add more members that could access the course (or courses) that you bought from this learning platform.
HOW TO MAKE A STAFF MEMBER A MANAGER
Click on the My Team link above (or click here) to access the Team Management page. Once inside that page, you will find two links that say MANAGE TEAM and ADD MEMBERS.
Click on the MANAGE TEAM link and it will show you the list of staffs that are part of your team.
Find and click on the name of the staff member that you want to assign as manager. You will then find the ASSIGN AS TEAM MANAGER button (beside the "Remove Member from Team" button) which, upon clicking, will give that staff an upgraded set of access rights.
HOW TO REMOVE MANAGER RIGHTS FROM A STAFF
HOW TO UPDATE MY CREDIT CARD DETAILS
HOW SECURE ARE YOUR CREDIT CARD DETAILS WITHIN THIS WEBSITE
Payments for your enrolled course(s) is handled using Stripe's API (via Stripe Connect) - thus the security measure that are enforced for online payments within this website are the same ones that they use.
Below are some more details taken from Stripe's article about their security.
A PCI-certified auditor has audited Stripe. We’re a certified PCI Service Provider Level 1. This is the most stringent level of certification available in the payments industry. To accomplish this, we use the best-in-class security tools and practices to maintain a high level of security at Stripe.
Sensitive data and communication encryption
All card numbers are encrypted at rest with AES-256. Decryption keys are stored on separate machines. None of Stripe’s internal servers and daemons can obtain plain text card numbers but can request that cards are sent to a service provider on a static allowlist. Stripe’s infrastructure for storing, decrypting, and transmitting card numbers runs in a separate hosting environment, and doesn’t share any credentials with Stripe’s primary services including our API and website.

